
Introduction
I received my first tape recorder in the summer of 1964. It was an RCA 7″ reel, half track mono, which ran at 17/8, 3-3/4, and 7-1/2 IPS. I recorded radio station broadcasts, and copy borrowed 45s to record in a “pre-mixtape” era.
Some of my tapes were then copied for friends. I sure wish I had that machine, and also the tapes. I had recorded nearly 50 tapes on .5 mil at 17/8 of stations like WKNR Detroit, WTOD and WOHO Toledo, and even WCFL and WLS from Chicago. Wouldn’t that have been fun to listen to, again?
I also traded tapes with people I knew. A kid down the street had a father who loved jazz, recorded jazz LPs, and recorded local groups who played at a bar in south Toledo. He recorded artists at the old “Rusty’s” in the south end of Toledo, Ohio? It was fun, and opened up a hobby and career for me.
By 1967 I was a tape-a-holic, trading and recording a lot of content off borrowed LPs, 45s, the radio, and even live performances. I was learning about tape recording, and luckily, I had my brother who worked in radio, and his friends in radio engineering showed me the proper way to maintain and care for tape machines.
By my junior year I was repairing and cleaning those old Wollensak T-1500 reel-to-reel tape recorders in the Whitmer High School A/V department. Before I could legally drive a car I was following around guys 20 and 30 years my senior, helping them servicing tape and cart machines. I didn’t get paid for it, but the experience was priceless!
Enter Dolby B
In 1968 Dolby-B noise reduction came out for the consumer market, mainly marketed to the cassette crowd. The “Dolby” name comes from Ray Dolby the scientist behind the noise reduction method. I met Ray at one of the engineering shows and he was patient explaining the process of the technology to a young kid. I was greatly appreciative for the lesson.
The Dolby-B noise reduction system typically made reel to reel tapes about 10 dB quieter, which was a blessing in the days of Scotch 111, 170, and their Ampex 631/641, Radio Shack, Shamrock, and Audiotape equivalents. This was before the age of better formulations of low noise tape came out. And ironically, a lot of those tapes still play perfectly, while newer tapes suffer the dreaded Sticky-shed syndrome.
A friend, and local radio engineer, Dave Collier, introduced me to Dolby B.. He used it on a Revox A-77, quarter track tape deck for recording classical and church choirs in 2-track, at 7-1/2 IPS. The quality was very good. As I recall, his unit were made by Advent. A good technical description of the Dolby-B process can be found on Sweetwater Sound’s web site.
Radio Shack had just come out with consumer tape recorders and cassette machines with Dolby-B integrated into the machines. This was a game changer for cassette users.
Radio Shack also sold an outboard consumer Dolby-B unit, the Radio Shack model DNR-1 Noise Reduction System, model number 14-893, (seen below). It was designed to be an “add-on” to a home stereo system. Under the top grey cover were the pots for alignment with the tape machine audio levels. It came with a 5″ reel, and cassette, containing alignment tones.

The DNR-1 was very functional and useful in situations where tape noise was a problem. Live school and church performances, spoken word, and even private music sessions benefited from 10 dB less tape hiss. I recall one recording made of acoustic, 12 string guitar which was album grade by early 1970s standards.
When copying from reel to cassette, (using Dolby B) the quality was noticeable over straight no noise reduction copies. Many of the early 70s tapes I recorded were encoded in the Dolby-B format and still sound good today! As a side note, Dolby B was not intended to remove all noise, as some “audio phules” think, but just take 18 to 12 dB of tape hiss out of the quiet passages.
When dubbing from a Dolby B tape you could sometimes cheat the system by copying to a fresh tape, as long as the 400 hz calibration tone was present on the new tape at 0VU. Yeah, it’s not perfect, but it did work for general purpose, non-studio copies. A few people I knew in the United Kingdom and I traded tapes this way.
Playing back Dolby-B tapes without a decoder sounds odd, since Dolby works by boosting high frequencies on record at low levels, and reducing high frequencies, (and recorded noise), upon decoding/playback. So if you listened to the playback of an un-decoded tape, at near “zero VU” levels may sound a little more treble, but as level dropped it was more noticeable.
Dolby-B received a very bad rap because non-professional users who recorded with different brands and formulations of tape found the playback sounded funny.
Recording of tapes on machines not properly biased and aligned to the tape caused tracking errors. Not all tape is alike, and different tape produced different EQ and level reference
Regardless, it worked for me because I knew how to use Dolby properly, and I still have more than 2,000 tapes recorded in either the quarter, or half-track format with Dolby-B. Some of these tapes contain recording sessions and content which are priceless.
In 2020, (and getting close to retirement), I decided to copy off many of my tapes. Dolby units were retrieved from storage, re-capped, aligned, and cleaned up. But now I had another problem.
Over the years I had converted my entire audio room to rack mounts. I use standard rack like you see in radio, TV, and recording facilities. So, what now? The answer was clear, build rack mounts for classic non-rack gear!
Creating Rack Mounts
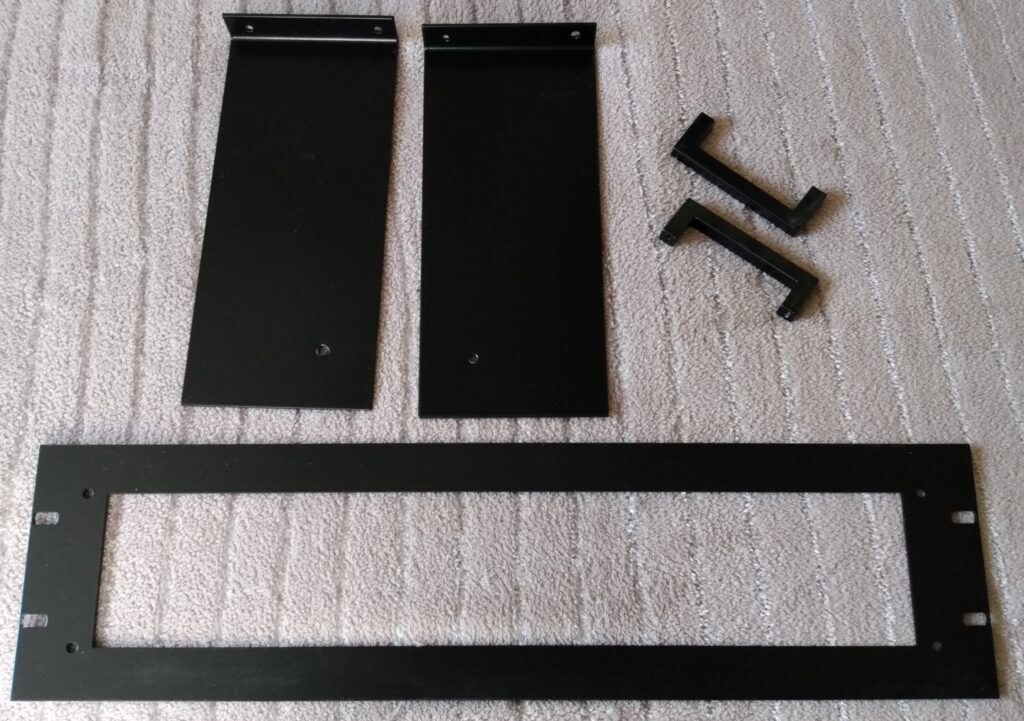
I designed my rack mounts around three pieces. A front plate/panel, side supports, and handles.
You can design a shelf system and have the equipment sit on a tray, and even make a face panel to cover the front. There are also companies that will make them for you. With a tray, unless you secure the unit, when you press a button on the front of the equipment, the gear can get pushed back into the tray. This can be fixed by installing a stopper in back of the machine.
The side supports mount to the unit using an existing screw used to hold on the cover. It then attaches to the front panel. A #8 screw attaches the side support, through the front plate, and is captured by the handles. When everything is tightened up, nothing moves. Its all one piece ready to go into the rack cabinet.
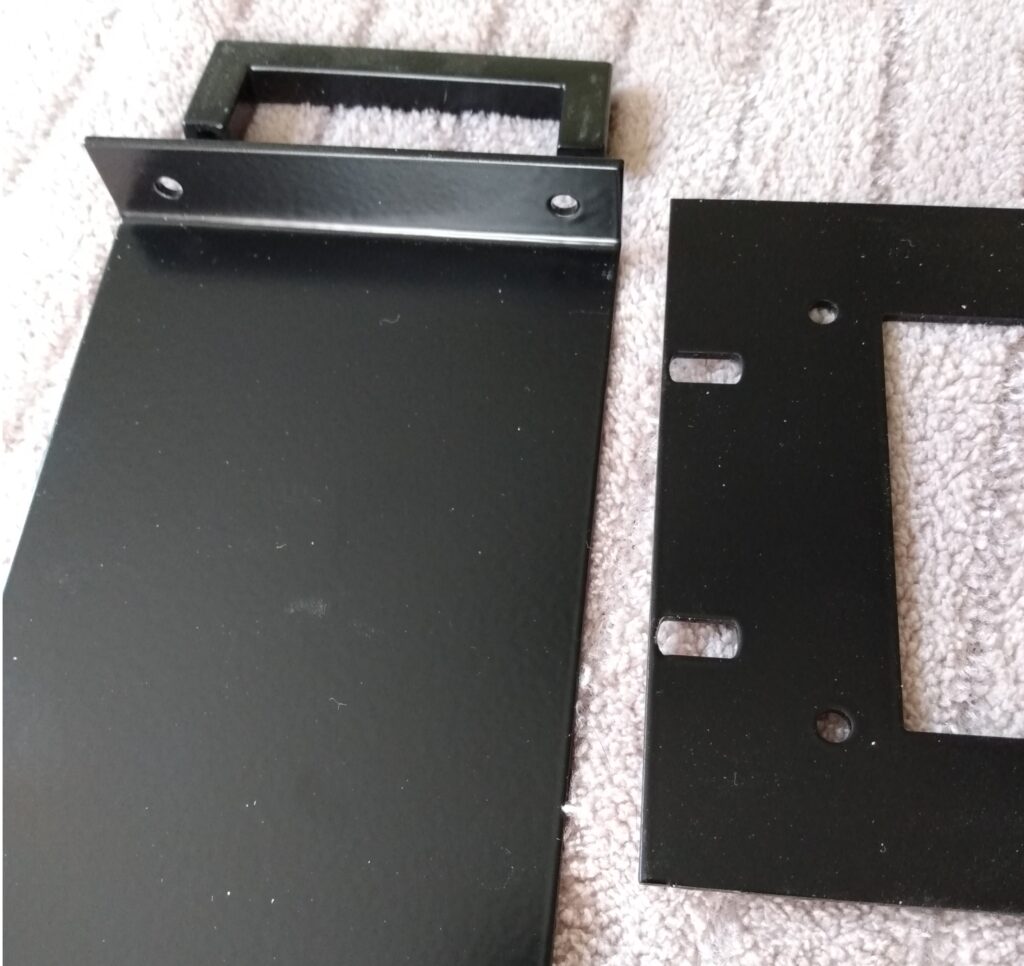
The side panel is made of steel, with a .5000″ lip bent at 90 degrees. The holes on the bend correspond to the handle alignment, and line up with the front panel. (See the pictures to the right.)
When assembled, the front plastic panel of the AN-80 is tight against the front rack panel. The front is held together with the screw mounting of the handles.
The back is captured to the equipment by a screw which goes through the side piece into an existing hole on the AN-80 used to secure the cover. (Note, this screw is a metric.)
If the existing screw from the AN-80 is not long enough, you will need to get another screw which needs to be about .375″ long.
The side panels are easy. Just a 90-degree bend, locate where the holes need to be, and you’re done. The front panel can be a little trickier. There are three ways to make one.
1 – You can make a rough rack panel with opening with a band saw, or scroll saw, with a lot of care and patience. Aluminum plate is available at most home store like Lowes and Menards.
2 – Optionally, have Front Panel Express make them for you with their easy to use software. You design the panel, send the file to them, and they make it and sent it back to you.
3 – Another source is Markertek’s custom metal services, which I’ve used in professional builds. Markertek also has blank panels, sold separately, and in bulk “contractor packs“.
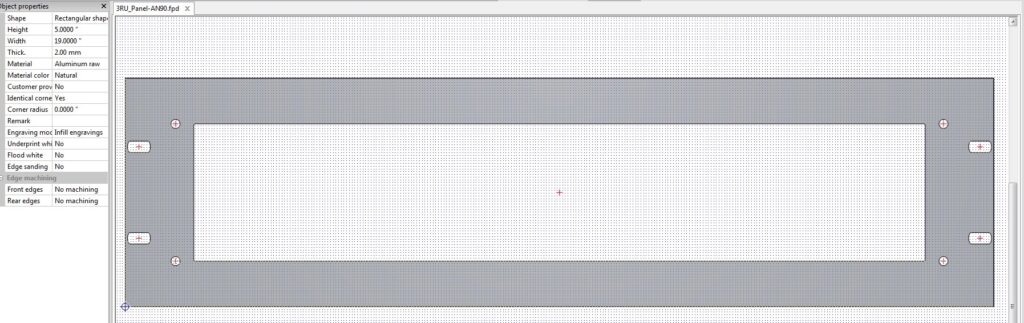
4 – If you have access to a CNC machine you can make panels easily. The stock should be at least 0.0787402″ thick (2mm), 19.00″ wide by 5.25″ tall, for a three RU panel. The Teac AN-80 required a rectangular hole, (4) round holes for mounting the side plates to the front panel, and (4) oblong holes for mounting to the rack mount to the rack cabinet.
The handles were from Lowes, kitchen cabinet department. Specifically, I used “Rusticware” 3.0″ Center to Center Chrome Rectangular Handle Cabinet Door Pull, Item #1442765, Model #993CH, ($7.53 each, need 2).
I use the square style handle for my audio gear, and the round chrome handles for my RF and ham radio equipment. (The Sugatsune Cylindrical Handle Cabinet Door Pull, Lowes Item #1270138, Model #H-42-B-8, is perfect for 3.5″ rack panels). With grey paint, and chrome handles, it has that “military look”.
After all the metal panel parts are made, I took them, and the handles, to a powder coating shop and had all the parts coated the same color as the Teac AN-80. They used PPC “Satin Black” powder coat, and the match was perfect to “Teac black”.
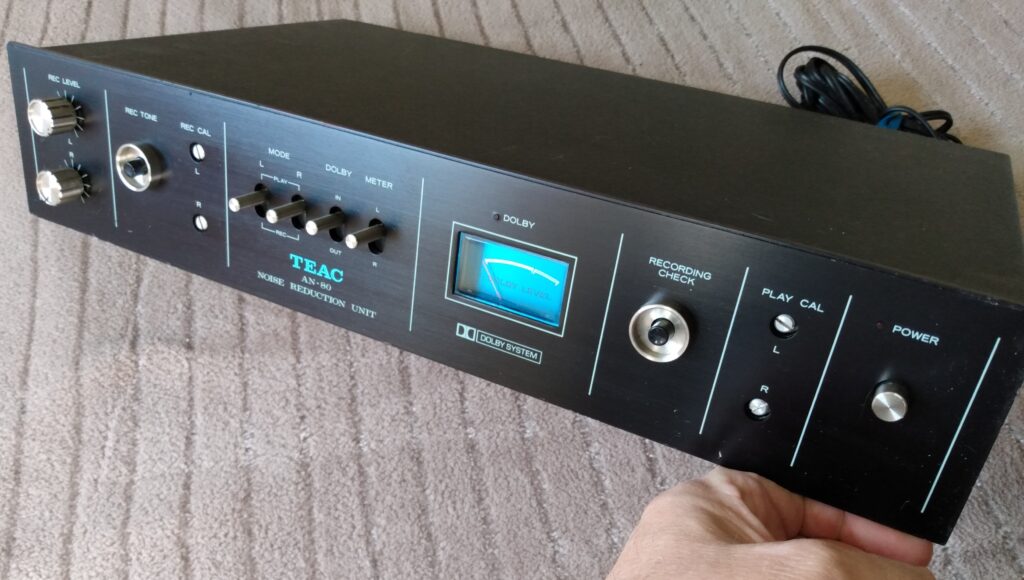
While metal and paint were underway, I recapped the AN-80 so I had ready for action when the panels were attached. I also changed the VU meter incandescent lamp to a soft blue LED.
As soon as all the AN-80 Dolby units are done I have Teac AN-50 and AN-60 to do. Also on the build schedule are rack mounts for a Teac X7R and Tascam A3440 reel to reel machines. I don’t think I’ve seen Tascam A-3440 rack mounts in 20 years!
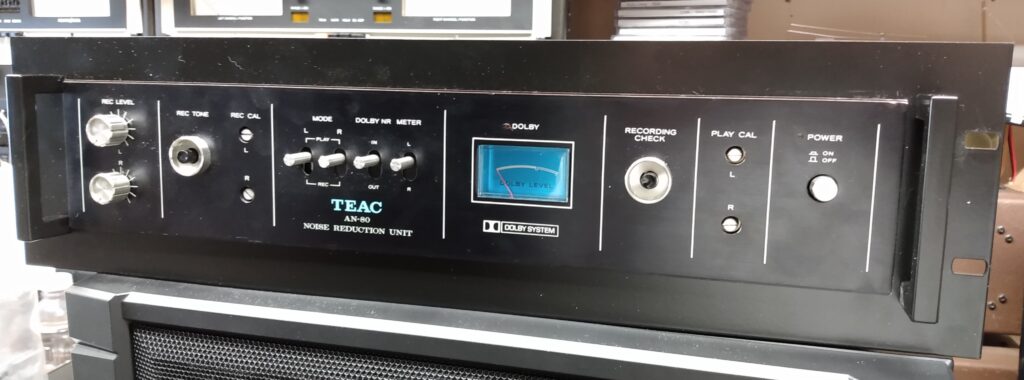
Here is AN-80 #1 hot off the bench in it’s new rack panel.
References and Resources
1). Format Characteristics and Preservation Problems Version 1.0 – [PDF]
2). Richard L Hess—Audio Tape Restoration Tips & Notes – [Web Page]
3). Fun article from the Chicago Tribune – [Web Page]